Film development — workflow and best practices
This article is aimed at making film development less intimidating for someone who has never tried it before, and to answer questions a beginning film development enthusiast may have. It specifically focuses on traditional (not C41) black&white development. Which is not a value judgement on the C41 development process, but — wait, it is a value judgement on the C41 development process. C41 is all about consistency; whereas with traditional b&W film development, an experienced darkroom wizard can pull all the stops and cause Dark Magick to happen. That’s exactly what makes it interesting. For the Professional, consistency is the Holy Grail, but for the true lover of this art, who has no deadlines, time in abundance, and can afford the occasional failure, it is much more important to sacrifice consistency in favour of getting the desired result.
And yet, the absolute beginner can take up their first development effort, and, following the instructions, make it a smashing success that makes them want more of this, and learn new skills as they go along.
If you’re someone who has developed more films than you had hot dinners (takeout pizzas not included), this may not be the content you were looking for. But chances are that I will highly value any input you may have! We do have a comment section for that, so fire away.
Whoever you are… go ahead, dive into the wonderous world of film development, and channel your inner Control Freak!
What to get
Your film developer of choice
I could make suggestions here, but even if you don’t have a goto developer by now, eventually, you’ll find one that works for you.
If you start out by using the Fotoimpex starter kit I talked about earlier, Adonal is a pretty safe shot you cannot really go wrong with. It’s an excellent starting point, and it’s a good developer within its limitations, but it’s not my personal favourite. I currently have good results with ADOX XT-3 (a direct replacement for Kodak XTOL), and I’m also going to try my hand at ADOX FX-39.
Stop bath?
I use running lukewarm (ca. 20°) tap water to stop development. Works for me. Others will insist you use a stop bath (usually acidic, more specifically citric acid). Fine by me, but I fail to see a difference.
Fixing agent
While vitally important, the type of fixer used won’t make your end result any better.
Wetting agent
After rinsing your film thoroughly to get all the chemicals off, you will want to soak it in a final rinse with wetting agent. This will prevent ugly spots when drying.
Stuff that is not in the starter kit, but every starter should have
Film clamps
At least one of those should have a hook to hang it, and the other one should have a weight that’ll keep the film straight when hung on the bottom end of the film.
If you lost or mislaid yours, use a clothes pin at the top, and enough clothes pins at the bottom to provide the weight.
Demineralised water
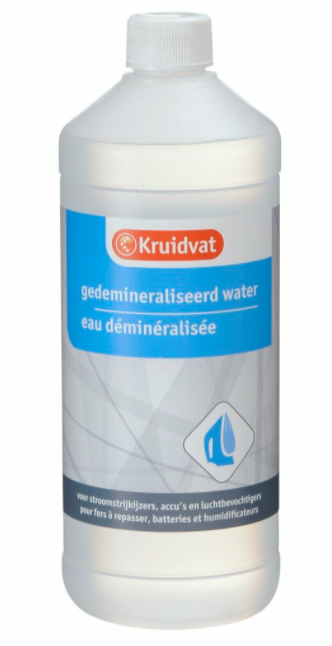
Whether or not you need this is dependent on the quality of your tap water. The chlorine added to it (if you’re in the UK) might upset the chemical properties of your developer or fixer, and the calcium content will leave nasty drying stains.
At a cost of 0,45 per litre, it’s not prohibitively expensive. You can can create a one-shot working solution developer for at least three 35mm films with that, but where I live, there’s comparatively little chlorine added to our tap water, so I use 50% demineralised water and 50% tap water just to make sure. This gives me enough for 6 films. from one litre.
For fixing agent, there is no reason to use demineralised water. Some sources insist that fixing actually works better with tap water, but as water quality varies, your mileage may differ.
Rinsing after fixing is, again, best done under a running tap.
But for us, the final rinse must be done in demineralised water with wetting agent! Our water has a relatively high calcium content, and if I do the last soak in tap water with wetting agent, I get bad drying spots!
So, roughly, I’ll use half a litre distilled water per 25mm film, which, for me, means € 0,23 is added to the chemistry cost.
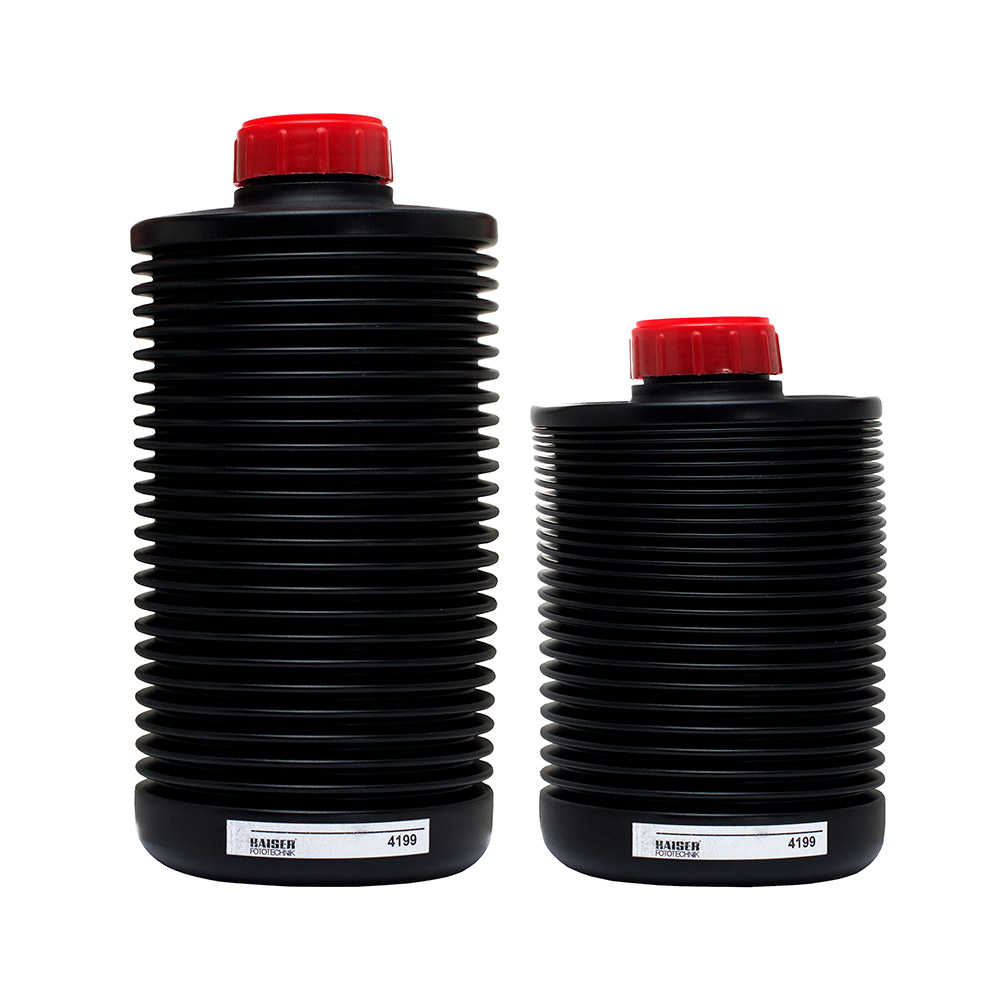
Storage bottles
Ideally non-translucent (you want to store your working solutions dark). Plastic bottles are ok, and ideally these are harmonica bottles that you can compress so as to keep as little air in as possible.
Creating total darkness
If you’re going to build a full-fledged darkroom for development and printing, you are going to have to do a lot more than I will describe. My aim is to take film development in my own hands, but I’m not going to print. I’ll scan in the finished film using a dedicated film scanner, and if I want something printed, I’ll send the file to a lab.
But to get the film out of the film canister and into the spool, and then the spool into the tank, you need a small space with Total Darkness. A small bathroom or even a toilet is enough — you need approximately a meter of tabletop space. I use a little, windowless loft above our garage, which gives me more than enough place to use as storage for camping gear, Christmas decorations and what have you, and still have more than enough space left.
Depending on how much light is happening at the other side of the door, you will now need to mask or stuff cracks, creases, keyholes, what have you. Go ahead, do whatever you think is necessary, A heavy black curtain or special darkening fabric may help. If it’s a utility room, you can also liberally use gaffer tape.
At some point, you’ll think “right, that should do it”. Find yourself a nice, comfy spot, and after switching the light off, wait 10-15 minutes to make your eyes get used to the darkness, and map out all the spot (note I’m not saying “map out any spots”) where you see light trying (and succeeding) to seep in.
Go back to the previous step, and repeat until no more light leaks can be found.
If you cannot get this done, there are a few alternatives. Let’s suppose you’re using the bathroom. If you can create a situation in which there is a way to make sure that there is no light outside the bathroom, you might have a solution that works.
If all else fails…
You could use a film changing bag! I’ve never done that, and I’m probably a bit too paranoid for that, but I can see how, in a dark room with unfixable light leaks, it would be an extra barrier for those pesky stray photons. But since most knowledgeable sources insist that you should be fine, it could be said that my paranoia is getting the better of me.
Anyway, this is stuff that needs to get done before you plan to develop your first film.
Preparations – creating the stock solutions
We’ll need to have our chemicals ready to use, at least in the stock solution (the solution from which we create our working solution). So, supposing we’re using a powder developer, create your stock solution, referring to the manufacturer’s instructions to do so.

Keep into account that some chemicals (most notably powder chemicals) want you to have your water at a certain temperature. It may take some time to let them cool down to the 20°C, so keep that in mind.
If you’re using a powder storage solution, don’t throw out the instructions after mixing it.
Mise-en-place
You’ll be working at a wet station (with running water and a sink of sorts), and your self-created black hole, where we will not allow water to be, because if your film or film spool gets even one drop of liquid on it, there will be much choice language, interspersed with technical terms and other profanities.
First, go to wherever you do your wet work, and set everything up that you will need there.
If you’re working from a stock solution that you created earlier, which you have stored in a cool place, allow sufficient time to get it, as well as the demineralised water you’ll be using, at the desired temperature. We don’t do that in the microwave… au bain marie is probably the best idea.
Consult the Massive Dev Chart to see the development parameters. Choose your film and developer, then consult the resulting chart to find the desired sensitivity, developer dilution, developer temperature and any other parameters that are applicable to that combination.
Now, we get into the darkroom. Before switching the light off, make sure you know Where Everything Is.
So… what’s “everything”?
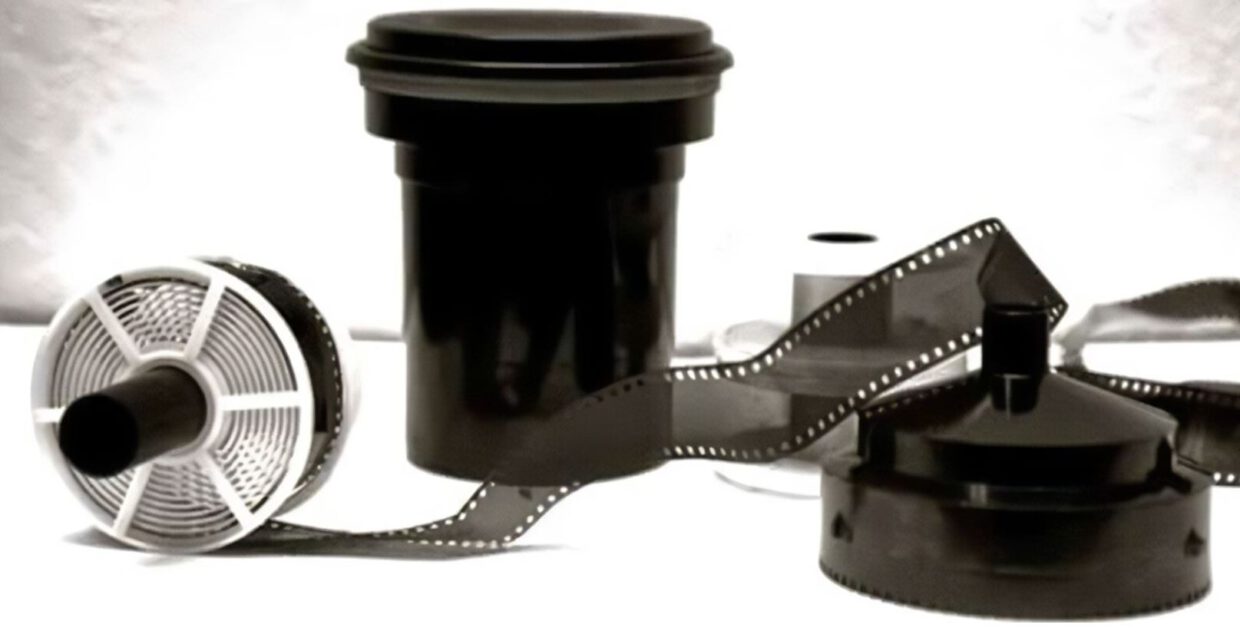
You will need: a pair of scissors, your film, the assembled spool, the spool hub that goes inside the spool, the tank lid, and the rubber cover for the tank lid.
What I do is: I lay these out from left to right, in the order I’ll need them — which is exactly the order hereabove. I then find myself an orientation point from where I can move my hand along the work top until I get at the object I need next. Last thing I do before the light goes out is to clip off the film leader.
Make sure your phone is off, or out of the way safely. Imagine you sitting there, having your film out, and somebody decides to call you, making your phone screen spew hordes of evil photons, wrecking your unsuspecting exposed film… yay, more choice expletives, one less film needing development.
Loading the film
This is typically something that I can never explain as well as a video, so I found you one.
I would strongly advise you to, if you are new to this, practice this a couple times with a throwaway film.
Into the light
Make sure you have everything you need — measuring cylinders, thermometer, funnels, film clamps. Take your time — it will allow the innards of the tank adjust to room temperature. If, minutes earlier, you just took your tank and reel in from the garage during winter, pouring the developer in that cold tank will cost you.
This is also the time to check whether you have a place to allow your film to dry! A dust-free, draft-free environment is best — chances are your bathroom is the best idea. Make sure that, at this stage, you have a spot ready to hang up the film in its clamps so that it hangs freely without touching anything. You don’t want to have to take care of that when you’re holding a wet film in both hands.
I use a rubber band that I wrap around our shower head — and this is the time to make sure it’s already on there.
Do a last check of your chemistry temperatures, especially developer! Remember, 21°C is not 20°C, you really need to get this right.
Set up a timer to the correct development time — minus 20 seconds. Or use the Massive Dev Chart app.
Development
Go ahead… pour in the development, then start the timer, and agitate according to your agitation scheme. Also include a few gentle bangs (more like taps) with the tank onto the worktop, to shake off any air bubbles that may have formed.
One thing: in order to pour the chemicals in, you will have to remove the rubber cover on the tank lid. If you’re like most of us, you will look at this quizzically, thinking “but won’t that allow light to get to my precious film?”
Trust me (or rather, trust Paterson) on this one. No, it won’t. It’s black magic. Actually, it’s the black bit that does it; and that’s physics, not magic. Your film is blinded by science!
A word on agitation
Some will insist that you agitate by turning the tank upside down a couple times; others will say that twisting the spool with the help of the agitator is just fine, as long as you do it consistently. I’m a twister, not a shaker… I’ve never noticed a visible difference, and neither have many others. Just as log as you do it in a consistent manner, you should be good.
Stopping development
20 seconds before the dev chart time expires (this is why you set your timer to minus 20 seconds), pour out the developer, and run it under running tap water of around 20°, emptying and refilling the tank a few handfuls of times (I use ten times as a guiding line). You cannot do this too often or too long.
The 20° value isn’t really important — just make sure it’s not at close to freezing (during winter it might be).
Fixing
Pour the water out of the tank, and pour the required quantity of fixing agent in. The time you’ll need to fixate the film varies per fixing agent, but you can’t easily overcook this like you can with developer. Also, if you’re re-using fixer that was already used, you’ll need to add some time. The instructions for this should come with the fixing agent. If you’re using a powder storage solution, don’t throw out these instructions when mixing it.
Rinsing cycle
At this time, it’s perfectly safe to take the lid off the tank.
Fill the tank to the top quickly with cold, but not completely cold, water and pour it out a few handfuls of times. Again, I use 10 as a guideline.
Next, turn the tap down to a trickle (not dripping, just a thinnish flow of water, I’d guess a litre a minute), and aim the trickle for the middle of the spool hub. Gradually lower the temperature to cold (there is no need for it to be cold; there’s just no need to waste energy on warming it). Let it run for… what? 20 mins? and then follow up with a few handfulls of fills that you pour out.
The Last Soak
The all-important Last Soak is leaving the film in the required quantity of demineralised water with wetting agent added to it. Soak it in there according to the manufacturer’s instructions, but as with anything except developer, timing is not super-critical.
Hanging the film to dry
Split the spool by twisting it open, gently take the film out, attach the film clamps, take it to the bathroom making sure you don’t bump into anyone or anything, and hang it out to dry with the heavier film clamp (or the most clothes pins) at the bottom. Allow it a couple hours to dry and harden sufficiently.
Post processing
Clean everything up thoroughly. If there’s any final rinse stuff left in the tank or the spool, the next development cycle is going to be a soapy mess. You do not want your development cycle to be a soapy mess.
Let everything dry, especially the spool spirals.