On metering light and determining exposure
For many of us, it is probably a valid assumption that 75% of our pictures will be correctly exposed when we set the camera to A, and there will be additional photos that are “good enough” so that they can be fixed in the mix.
But sometimes, at least for me, you hit upon a situation where you need to expose carefully. “Hmm, I would’ve thought these cobblestones would turn out a shade darker, but when I do that, I’ll lose detail in the deep shadows over here…”.
And sometimes, you come across a scene that you absolutely, positively want to shoot, but the subject contrast range poses a seemingly insurmountable challenge.
Seeing how I was raised with a Voigtländer Vito C from the early sixties, and a handheld light meter, when that happens, I suddenly remember ye olde light metering tools and skills.
This article aims at helping you understand the basic underlying principles about metering light. If you understand it, you don’t have to burden your memory with it. It helps you to satisfy your inner control freak, and it helps you to get better pictures.
And it’s not rocket science!
Differences between exposure strategies
The most common approach used to be to assume that your scene brightness would always work out to middle grey (18% grey value if I remember correctly). I’m guessing this worked fine until someone thought “you know what, let’s make a photo of this pretty snowy landscape”, only to find out that it was seriously underexposed. That led to the realisation that assuming middle grey is not always your best bet.
Normally, when you shoot an image, especially on black & white, you are trying to pre-visualise what you want it to look like when it’s done: “I want this part to be brighter than that part, but not overly so, and I still want to see details in the deep shade under that shrubbery on the left over there”.
As we can see, we’re already thinking in different shades of grey… which we could call “zones”.
Enter “the Zone System”. Formulated by Ansel Adams and Fred Archer, it aimed at unifying the exposure and development process, formalising the principles of sensitometry (the study of light-sensitive materials).
“Wow, that sounds expensive. Explain like I’m five, please…”
Essentially, it cuts up the entire spectrum from pure black to brightest, completely washed out, white into “zones” — eleven of them:
| Zone | Description |
|---|---|
| 0 | Pure black – no detail |
| I | Near black, with slight tonality but no texture |
| II | Textured black; the darkest part of the image in which slight detail is recorded |
| III | Average dark materials and low values showing adequate texture |
| IV | Average dark foliage, dark stone, or landscape shadows |
| V | Middle gray: clear north sky; dark skin, average weathered wood |
| VI | Average Caucasian skin; light stone; shadows on snow in sunlit landscapes |
| VII | Very light skin; shadows in snow with acute side lighting |
| VIII | Lightest tone with texture: textured snow |
| IX | Slight tone without texture; glaring snow |
| X | Pure white: light sources and specular reflections – paper white, no detail |
The significance of zones is that each zone represents one stop.
The formal full application of the zone system is a source of (sometimes heated) debate. It will require years of study and experimentation, and is largely outside the scope of what I intend to write. But when it comes to my own practical application, my most important zone is zone III, the zone where I still want to have adequate detailing in the shadows.
What I do is, I select a part of the scene that I want to have in Zone III, measure that part only, and then underexpose from that value by two stops! So, if my Zone III bit measures at 125/f4, I will shoot at 125/f8.
“So, why don’t you use Zone VII or VIII and overexpose by two stops?”
Because if I’m working on negative film, I’ll trust the film to take care of that. Negative film is, by nature, very good at that (see this article for more information on that). But if I’m working on transparencies or on digital, that is in fact exactly what I’m doing. But this is all about nerding out on film, more specifically, nerding out on traditional B&W negative film. So for me, for the purpose of this series, zone III it is.
There is much, much more to this. Using the Zone System fully implies that you’ve spent years experimenting with combinations of films, developers and development techniques to document how they will behave, and more specifically, what subject contrast range you can expect it to capture, and how they will be rendered.
Measurements and interpretations
Using an exposure determination method like the above puts you back in manual mode. You’re starting to understand what you are doing, and applying that understanding to making photos. You will probably not apply the Zone System in its formal dress, but you are using parts of it in order to get as close to the desired result as possible. Which is probably as far as most of us will ever come in real life. Only in the most extreme cases will you be eking out every last bit of the system. I did that once, and the result was pretty spectacular.
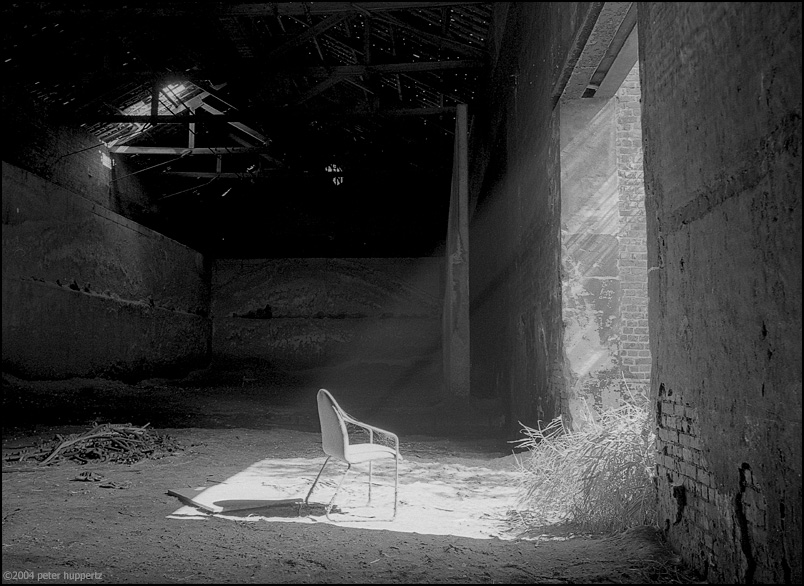
Measuring this scene, and thinking about how to compose, capture and develop it, took me around 20 minutes, using a handheld spot meter and a lot of walking about (which had the added benefit of kicking up some dust, thus making the sunlight “visible”). I took readings of the wall right-front and the dusty floor (zone IV), the back wall (zone III), the opening (zones V and VI), the spot on the floor where the sun hit the dust (zone VII or VIII would be okay) and the seat of the chair (zone X would be unavoidable).
As described in this article, I ended up on pulling all the stops during film development, to encompass as much of the subject contrast as I could. You may have seen this picture a couple times in other articles, and you are probably aware that I’m pretty proud of it.
But nine out of ten times I resort to manual, I use zone III or sometimes IV as my point of reference, measure that point, and underexpose up to Zone V (so two stops for Zone III, one stop for Zone IV).
For the picture below, I measured the concrete to the right of the cobblestones, put them in Zone 4, and then underexposed one stop. It was a slightly hazy day, so I knew I could get away with the highlights.

“… ok, hang on. How would I do this with my camera? I don’t have a hand-held meter, and I’m sure as hell not gonna spend a three-figure amount to get one!”
Yes, I understand that. When I made this picture, I didn’t have one on me too. I just had the XE-1 with me, and unlike its younger sibling the Leica R3, the XE-1 doesn’t even come with a spot meter function. It has some form of weighted average metering (I haven’t sussed yet how it weighs its metering, but I suspect it is some sort of CLC (Contrast Light Compensation) which favours the lower half of the image to compensate for bright skies), or Center Weighted Average, I’m not sure.
But when you do a detail reading with only the slab of concrete in the viewfinder, you’re spot-metering with your feet, and you get as close to a “stupid” reading as possible. Just gimme the numbers; I’ll do the interpretation myself, thankyouverymuch. And that is what you would want — contrary to your camera, you know what you will want the picture to look like — you’ve pre-visualised it, and that’s what you want to get. Any artificial intelligence cannot replicate that for you.
Incident metering versus reflected-light metering
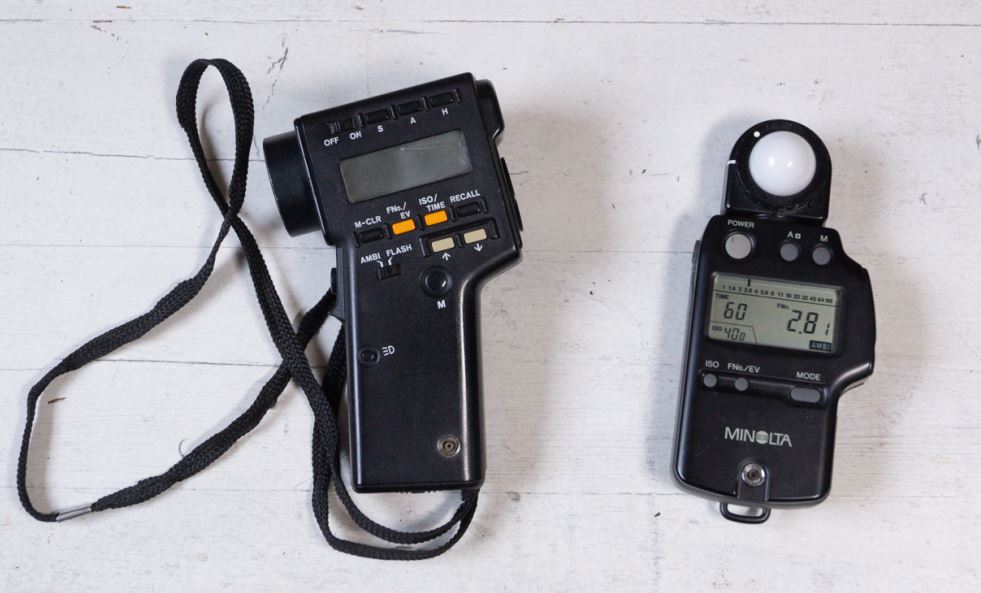
Incident light metering is based on measuring the light that’s going to hit your subject. You do that by placing the meter at the same place as the subject, and aiming it to where the camera will be. The white bulb will gather the light that’s going to hit the subject from a 180° angle. It does not provide for putting specific spots of the picture in a zone, but it is a very reliable way to get a well-exposed picture. I invariably use it when doing manual flash photography (using a standard flash cable, the meter can trigger a flash… or a wireless flash transmitter. Here, it is conveniently telling me to shoot this picture at 1/60/f2.8.
For reasons that I won’t go into, to avoid overly graphic descriptions of the resulting mayhem, this is probably not the most practical approach if your subject happens to be a troupe of lions lunching on a recently captured wildebeest. They do not understand the value of incident metering, and will probably take issue with you sitting down right next to them with your incident meter.
The Minolta Autometer IV-f, to the right in the picture has the white dome for taking incident meter readings on. There is a separate accessory for metering reflected light in a 40° angle (which you would use to take a reading from where the camera is and then point it at the subject), and there is an accessory which was sold separately which would turn it into a 5° spot meter of sorts, but the Minolta Spot Meter F to the left does this a lot better and more convenient (at a 1° angle).
I bought both items dirt-cheap (a 2-digit euro figure) somewhere between 15 and 20 years ago, when film was quickly going out of fashion in professional circles, and everybody was busy watching histograms on their expensive camera back displays. They both run forever on a single AA battery, and they can be (and are) calibrated to be dead-accurate.
Using your camera’s meter like a ‘stupid’ meter
As I said, your in-camera meter will jump at every opportunity to deploy its artificial intelligence.
Let me give you an awfully boring, but understandable, example.
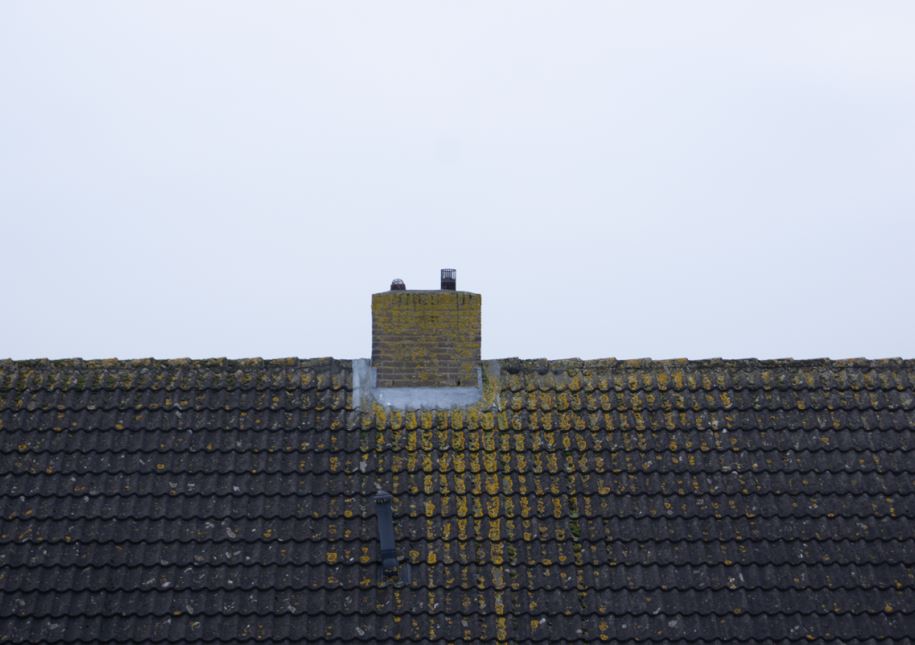
A grey, dull, featureless sky, and a roof with dark pans. I tried the Minolta XE-1 (a seventies behemoth with probably a center–weighted average metering system), a Minolta Dynax 7 set to matrix metering, and the Alpha 77, and they agreed to within half a stop. If we put the dark roof pans in zone III, that worked out to 1/90/f5.6, which was what they all wanted. I then verified this with the Spot Meter F, and it turned out that this was spot-on.
But a couple days ago, I tried the same thing against a partly blue, partly cloudy sky, where the clouds were lit by the afternoon sun. and the Dynax 7 was underexposing with no less than two stops compared to the XE-1!
I then took a spot meter reading (the Dynax 7 has a spot metering facility), metering the dark roof pans, and placing that in zone III would result in the two cameras agreeing if I’d underexpose two stops from that reading, which indicates that the XE-1 was probably more on the money with its reading, provided we were working with black&white negative!
Then, using the Dynax 7, I took a spot meter reading of the brightest part (the sunlit clouds), and if I would’ve placed these in Zone VIII, and I would’ve overexposed three stops from there as you’d do with colour transparencies, the Dynax 7 would have been almost exactly right!
This should give you an idea what sort of artificial intelligence you’re up against, and how it can influence your result to the point of upsetting it.
But in combination with a decent basic understanding of the underlying theory covered hereabove, the spot metering facility on the Dynax 7 is incredibly helpful if you want to do detail readings. I wish my XE-1 had that.
And it’s that decent basic understanding of the underlying theory which I think will help you to channel and satisfy your inner control freak, and give you better pictures as a bonus, because it takes the nasty surprises out of the equation.
1 Pingback