
I have a little budget-on-a-shoestring photo studio setup here. It went through several stages, mostly stages of woe, until I settled on what I use now. I started out using various cheap RF camera triggers, and corresponding receivers for the flash units, a flash meter, two secondhand flashes, cardboard home-made light shapers (soft box, snoot, barn doors), two cheap light stands, and a home-grown background system.
It worked (sort of), but it was tedious. Sometimes the trigger would cause flash sync issues, leading to black frames. Sometimes the cardboard light shaper came off. And the secondhand flashes were not exactly the last thing in light consistency for intensity or colour temperature. And if I attached a somewhat heavier light modifier to the flash, the light stand would bend like a fly fishing rod.
The result was that I (the photographer) and whatever it was I tried to photograph, needed a supply of patience, as well as a library of choice expletives when things went wrong consistently. And to add insult to injury: the end result wasn’t always as good as I got when I used the (expensive) school equipment of fourty years earlier.
Eventually, I decided to spend a bit more money. I got myself two relatively new, powerful Godox TTL flash units (which can also be used on-camera) and a luxury Godox remote trigger, two Godox S2 Speedlite S-Type Bowens mounts, a Godox 600mm softbox with grid, a reflector dish with grid and attachable barn doors, and a snoot with two grids. No receivers needed because the Godox flashes have them built in.
Total money spent: 395 euros. Then I found out that I needed to upgrade the light stands because especially the soft box was way too heavy, so that added another 30 euros (secondhand). I already had two flash-through umbrellas, which would have added an additional 30 euros, and for my birthday I got a background system with a green screen and two decent stands. Which cost my beloved 60 euros because it was conveniently discounted. So that’s an additional 120 bucks.
Mind you, not every flash is going to cut it. Using light modifiers is going to cost you light. With my V860-II and 685-II flashes (both with a guide number of 60), in the pretty confined space I have available, I never run out of light. But using the Nikon SB28 flash I had a couple years ago, I did sometimes have to open up to f2.8 or wider.
The end result is that I have a decent (mostly secondhand) studio setup for 515 euro, which will actually cover at least 95% of what I would need. In fact, I’ve yet to come across a situation where my result would have benefited from more, or more expensive, equipment.
“So… go ahead, show me.“
Sure. Let’s start with the light stand.


This is the Light Stand 805, sold under different brand names. It’s a fairly sturdy standard light stand that will reach up to 2.42 meter high, and carry up to 4kg of equipment.
On top of the light stand is the spigot (the picture on the right). We’ll meet what the spigot is for in just a moment…
The Godox Speedlight bracket with Bowens mount
This bracket will go on top of the standard light stand spigot we just talked about. On the left picture, you see the front, which has the mounting point for Bowens accessories, which we’ll learn about in the next section.
You also see the space where a regular speedlite-type flash will go, and the knob with which to screw down the top plate that clamps the flash in place.
In the picture on the right, you see the system from the back, with a flash unit in place.
This flash happens to be a Godox flash, but you can shove in any other reportage flash as well. I have yet to see a speedlight-type flash that wouldn’t fit.
The bracket goes on top of a standard spigot, and will facilitate mounting an umbrella, which is one of the light modifiers we’ll come across later.


There are two versions of this: the Godox Speedlight Bracket with Bowens Mount and the newer version, the Godox S2 Speedlight Bracket with Bowens Mount. Differences: the older version can be adjusted up-or downwards in something like 30 degree steps, and the newer one adjusts steplessly (which is a slight advantage), and the newer version can be a bit of a bitch to get a flash umbrella in (which I find a disadvantage). A manual elbow-grease modification is needed to fix this.
Of all the systems that facilitate getting a speedlite flash on top of a light stand, this is by far the best. It is very sturdy, and because the bracket carries the flash and your light modifiers (rather than having the flash in a cold shoe that somehow goes onto the light stand, and then letting the flash head carry the light modifiers), this beefy bracket does all the heavy lifting.
I got mine off Amazon for less than thirty bucks. Totally worth it.
The other reason why I like it so much is because it takes standard Bowens accessories.
NOTE: Keep in mind that everything written here was true on July 27, 2025.
Bowens accessories
These are generally light modifiers that sit in front of your flashlight and modify the light to fit specific purposes. A light modifier is a device that modifies the way the light comes out of the flesh, to make it softer, or to concentrate it in a narrow beam.
Here you see a reflector dish. This goes onto a studio strobe with a Bowens mount… or, as in my case, onto the Godox bracket.

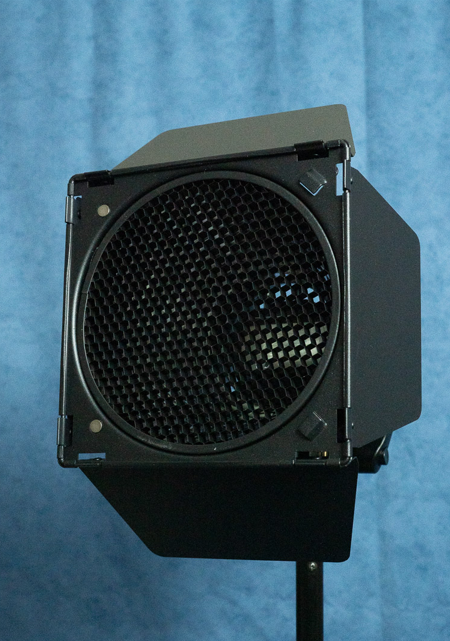
Another light modifier would be the snoot. This bundles your flash output in a small beam of light, and in combination with the grid (in the front), the light is made very directonal. This is often used for hairlights.
The one I got came with a blue, red, yellow and green colour filter (which I have yet to use).

Smart accessory kits
The reflector dish I showed you earlier is actually a part in such a smart accessory kit.
Here are the barn doors, mounted on the reflector.
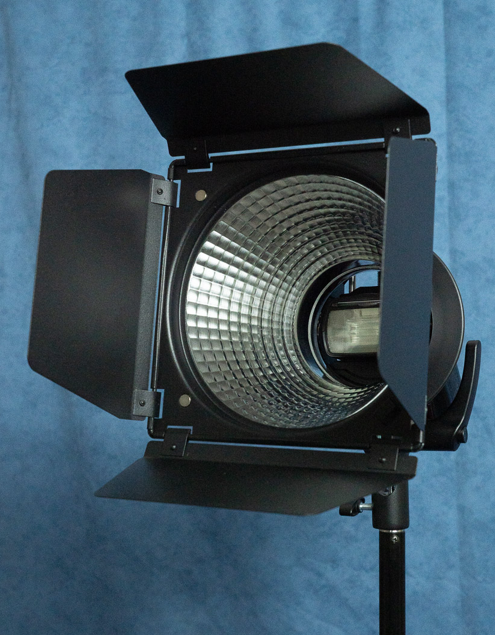
Here, the grid is mounted inside the barn door frame
And here, the colour filters are placed in the barn door frame.

This entire setup is now €47,99 on Amazon, but when I got it, it was on offer for less than thirty.
Godox 7 Inch Fish Scale Pattern Standard Reflector Diffuser + BD-04 Barn Door with Honeycomb Grid and 4 Colors Gel Filters : Amazon.nl: Electronics & Photo
The softbox
You can, of course, buy a Bowens-mounted softbox. But wait… Godox sells a kit, currently with either the old or the new bracket and a 60x60cm softbox with an included grid that sits directly on the bracket itself. This kit sells for either €57,95 with the old style bracket, or €79,95 with the new S2 bracket. If I’d have to choose again, I’d choose the old version (see under the section “Godox Speedlight bracket why).
It goes straight onto the bracket , and when in use, it looks like this:

Soft boxes come in many shapes and sizes. Since my budget and my space is limited, this relatively small softbox is all I have. It also folds away for easier storage.
Size matters!
The larger the relative size of the light source (the larger it appears to be to the subject), the softer the light will be.
This illustration (nicked off Reddit) shows it best.

We’re talking relative or apparent size here, because the closer the softbox is to the subject, the larger it appears to be. And if the light appears larger, it is capable of “wrapping around” the subject better, producing a softer light.
This is why direct sunlight is so harsh — yes, the sun is ruddy big, but it’s so far away, it is apparently small to the subject. A bright wall close to the subject that reflects the sunlight is a much bigger light source.
The umbrella
Of the direct light sources I have available, the umbrella is the largest. Here… look how big of a light this tiny speedlight flash unit suddenly appears to be!

The umbrella also casts the light in all directions. Here, look:

Positioned close to the subject, this is the softest direct light I can come up with. If you want more softness, you could use two flashes with umbrellas — one on the left, one on the right
Or you could use a large reflective surface opposite your flashlight. This will reflect some of the light that you direct to, say, the left side of the face of your subject, back to the right side of the face, giving a nicely, balanced portrait.
If you want ultimate softness, you forget about direct light altogether and point your flash towards the reflective surface. This is a technique I use to photography my wife’s paintings, but that’s another story.
Limiting light spreadout
We’ve talked about a grid before — we had one in the snoot, one in the reflector dish, and one inside the softbox.
A grid does only one thing — it doesn’t alter the apparent size of the light. So your softbox remains a softbox and the snoot used by itself will produce very harsh shadows. But the grid limits (fairly gradually) the light spread out to the sides.
Let me show you how that works. The left one (“nuke ’em till they glow!”) is straight ahead, the second one is at a 30° angle, the right one is at a 60° angle:


Here is the same scenario with the softbox with grid:


The barn doors do the same thing, but, as you can imagine, much less gradually. The doors just block the light entirely.
How to trigger the flash
“So, how to make that thing fire?”
You could, of course, wire up your flashes using one of more cords, and/or a slave trigger. Or a cheap Chinese flash trigger transmitter and the corresponding receiver hooked up to your flash. I’ve tried it all, but I’ll leave working out how as an exercise for the reader. Brush up on your expletives vocabulary.
The advantage of Godox flashes is: they have a built-in receiver. So you can either use them on-camera, or you can use them with a Godox transmitter on your flash shoe.
I found the Godox transmitter far more reliable than the cheap transmitter/receiver combinations I used. Pocket Wizard also makes very good transmitter/receiver combinations, but they cost an arm and a leg.
You can get a basic Godox transmitter for as much as 60 euros, or the pro version for about €85.
Or you go on a secondhand scavenging hunt and get the pro transmitter and a big fat Godox V860-II for 150 euros, which is what I did. Then I got a secondhand Godox 685-II for 80 euros and lo and behold, my transmitter controlled two light sources!


Both versions (used with Godox TTL flash units), will support TTL flash. There are versions for Nikon, Canon, Sony (for the new multi-interface flash shoe) and Fuji.
Another advantage is that you can control the flash output of each unit (up to four) from the transmitter rather than by walking over to each flash to set it.
Backgrounds
You can use background cloths, or background paper.
I’ve found that I greatly prefer background paper. If you get a decent quality (I use Bresser), it will block more light coming from behind, and background cloths tends to form creaks and folds, which are horribly distracting.
Paper is indeed more expensive, but there’s 11 meter on a roll, so if you find yourself cutting off a meter every now and then because it gets dirty or used, it’ll last you a long time.
These rolls can be shoved over the horizontal bar of your background system. Since the horizontal bar of my el cheapo system bends under the weight, I turn it over every other time to make it bend back.
… he wrote. And then, something funny happened as I started to write this.
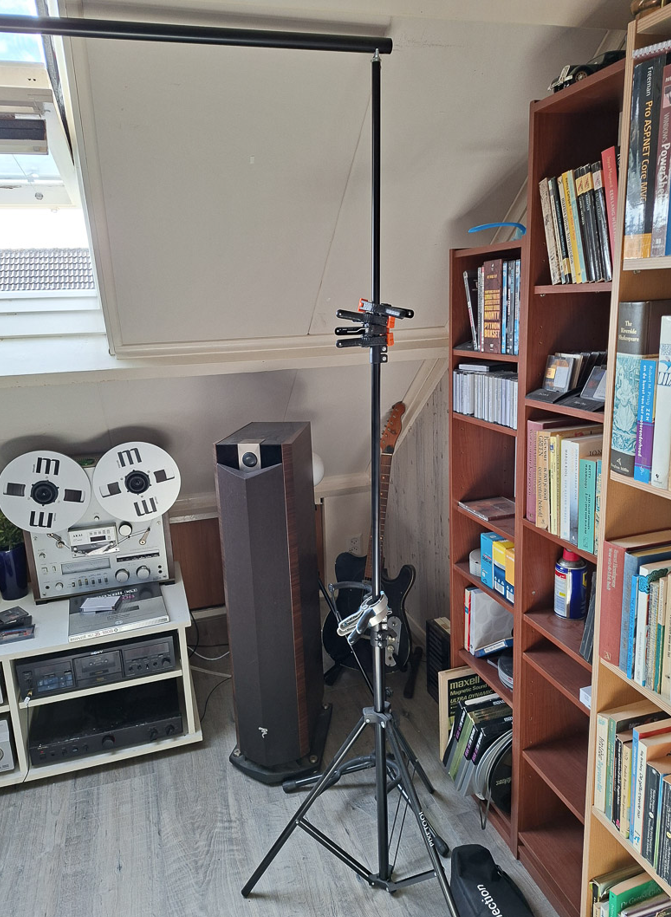
You see, up to the evening on which I wrote the above, my background system consists of two light stands, with a horizontal rod on top. Looks messy if you have this permanently in your man cave…:
As I was writing along, I* thought, let’s look up some approximate prices for the reader
And then, an angel appeared to me in a vision I hit upon this:

22 euros, plus the paper rolls you want, and you have all you need.
It’s supposed to hang off a vertical wall, but I reckoned it would work almost as well on a plasterboard wall under a 45° angle — provided I’d use drywall expansion anchors. Which are about a tenner per twenty, and you only need 8. The one I use say that they can carry 15 kg per anchor, so I’d reckon 8 anchors would safely carry my 3kg roll of background paper.
And indeed it does!

Lowering and raising it goes pretty well with the orange chain, although raising it needs a bit of care because of the unexpected angle. But if you do that, it works brilliantly.

Get a few weighty clamps (you’ll find a pack of 4 in the 5 euro bin of your DIY) to hold the paper straight down.
If you need to change the background colour, that takes a minute or five of fiddling. If you have plenty of space, you can also get a setup which will hold three background rolls, so you get to pick which one you want to use today.
You’ll also want to get your rolls of background paper in the same width.
So yeah, the effort of writing this article directly improved my own poor man’s studio.
Camera
Indeed. You cannot control your Godox flashes with your Iphone.
But chances are, if you’re reading this, you already have a decent camera, and one with a flash shoe as well.
One advantage of using flash is that, if your flashes are powerful enough, you don’t need to crank up your ISO to chroma noise-inducing levels.
I have a Sony A900 that I had sort of discontinued using because noise would escalate steeply at ISOs above 400. I now own an A99-II (using the same sensor as the 43mp Sony A7R-II), and it completely outguns the A900 when it comes to noise control at higher ISO settings. But when I started to photograph my wife’s paintings, I found out that, at ISO 100, the A900 was just as good regarding noise, but also it deals with reds noticeably better. So, when 24 megapixel is good enough (which is “always”, actually), the A900 has gained a new lease on life as my standard studio camera.
With the brilliant optical viewfinder, focusing manually is a piece of cake too.
Tripod
Yes.
… no, you don’t NEED it. But trust me, you’ll want it. If you’re going to do product shots, it is THE way to get a consistent standpoint as you fiddle with your lighting. Combine it with a remote release solution, and your life will become a lot easier.
It doesn’t need to be the last word in stability weighing in at 12 kg (looking at you, Triaut). You’re not shooting the moon with your 1600mm lens, and you’re not doing 20 second exposures of the Milky Way. But it needs to be stable enough to keep your equipment where it is.
… and that’s it. You’ve seen it all. This is it. Currently (*cough*).